Understanding Nanite: When to Use It and When to Skip It
A practical guide for indie developers making informed decisions about UE5’s virtualized geometry system
We’ve seen a lot of confusion in the indie dev community about Nanite. Marketing materials make it sound like a magic “enable and forget” optimization, and we bought into that early on. After testing it across multiple projects and digging into the actual documentation, here’s what we wish someone had told us from the start: Nanite excels with high-poly photogrammetry on high-end hardware, but traditional LODs often outperform it for typical game assets and broader hardware targets.
This isn’t a knock on Nanite — it’s genuinely impressive technology. But it’s a specialized tool, not a universal upgrade. Let’s break down what it actually does, where it shines, and when you should skip it entirely.
What Nanite Actually Does
Nanite is a virtualized geometry system that replaces traditional LOD (Level of Detail) workflows. Instead of manually creating 4–5 simplified versions of each mesh, Nanite breaks your high-poly source mesh into 128-triangle clusters organized in a hierarchical structure. During rendering, it intelligently swaps these clusters based on camera distance — different parts of the same mesh can display at different detail levels simultaneously, with seamless transitions and zero popping.

The real performance trick is Nanite’s software rasterizer. Hardware rasterizers waste significant GPU cycles on sub-pixel triangles, outputting 2×2 pixel quads even when only 1 pixel is actually needed. That makes them roughly 25% efficient at best for tiny triangles. Nanite’s software approach handles these micro-triangles about 3x faster — in Epic’s demos, over 90% of geometry was software rasterized.
Nanite also uses a visibility buffer that records only triangle IDs before shading. Materials evaluate per-pixel only for visible geometry, eliminating overdraw entirely for material costs. This two-pass occlusion culling draws what was visible last frame, builds a depth buffer, then tests previously-occluded geometry against it.
The key tradeoff: Nanite shifts your performance bottleneck from geometry to materials and memory. With traditional rendering, material complexity is one factor among many. With Nanite, material cost becomes the primary concern — we’ve seen 200–300% performance gains from simplifying materials on distant foliage in large Nanite scenes.
Hardware Requirements and Platform Reality
Before committing to Nanite, understand where it actually works.
Minimum GPU requirements:
- NVIDIA: GTX 900 series (Maxwell) works; RTX 2000+ (Turing) recommended for full async compute benefits
- AMD: RX 400/500 (Polaris) with limitations; RX 5000+ (RDNA) recommended
- Intel: Arc A-series supported; older Intel GPUs unsupported
VRAM: 6GB minimum, 8GB+ recommended for development, 16GB+ optimal for complex scenes.
Nanite requires DirectX 12 with Shader Model 6.6 (or Vulkan with 64-bit atomics). On unsupported hardware, it falls back to auto-generated LOD meshes with a console warning — which may or may not match your quality expectations.
Console support:
- PS5 and Xbox Series X: Full Nanite support, typically hitting 30–60fps with dynamic internal resolutions around 800–1800p upsampled via TSR
- Xbox Series S: Supports Nanite but with major compromises — 540–1080p internal resolution, no Lumen reflections, reduced foliage density. Its 4 TFLOPS GPU and 10GB usable RAM limit capability significantly
Steam Deck: Nanite technically runs on the Deck’s RDNA 2 architecture, but expect 30–40fps at low-medium settings with mandatory FSR/XeSS upscaling. Epic’s Matrix City Sample runs sub-20fps. Some community members report Nanite buildings rendering invisible due to Proton driver limitations. If Steam Deck is a target platform, test early and often.
Mobile (iOS/Android): Not supported. No plans for support. Mobile GPUs lack the compute capability, memory bandwidth, and thermal headroom. Use traditional LODs and baked lighting instead.
What UE 5.5 Changed
UE 5.5 addressed one of Nanite’s biggest limitations: animated characters.
Nanite Skeletal Mesh Support (Beta): You can now enable Nanite on skeletal meshes with
r.Nanite.AllowSkinnedMeshes=1. This is still beta—expect some rough edges—but it opens up virtualized geometry for characters, not just environments.Performance improvements:
- 20% faster masked material rasterization through a sliding window vertex cache
- Runtime-adjustable streaming pool size (useful for graphics settings menus)
- Reserved resource allocation that prevents memory spikes during pool resizes
- Dynamic quality target adjustment when overcommitted, distributing detail more uniformly
Editor workflow fixes:
- Resolved flickering Nanite selections with TSR/TAA
- Added proper selection through occlusion
- New Fallback Target setting for explicit control over fallback mesh generation — choose between Relative Error or Percent Triangles targeting
- Texture Color Painting as an alternative to vertex painting (scales with texture resolution rather than vertex count)
Experimental additions: Spline mesh support via
r.Nanite.AllowSplineMeshes=1, and continued landscape improvements.What Meshes Work (And What Doesn’t)
Supported mesh types:
- Static meshes (primary use case)
- Geometry collections (Chaos destruction)
- Skeletal meshes (5.5+, beta)
- Landscapes (experimental)
- Foliage via instanced static mesh
- Spline meshes (experimental)
What doesn’t work:
- Morph targets
- Mesh decals (require translucent blend)
- Translucent materials entirely — the visibility buffer assumes single depth per pixel, and transparency breaks this model
Material constraints: Only Opaque and Masked blend modes are supported. Translucent materials render with the default material and log warnings.
Here’s the catch with masked materials: they’re substantially more expensive than opaque. Epic’s own guidance notes that masked-out pixels cost nearly as much as drawn pixels. Traditional billboard-style foliage cards can actually be slower with Nanite than without.
World Position Offset (WPO): Supported but expensive. Nanite meshes with WPO split into smaller clusters with individual bounds. You must clamp displacement with
Max World Position Offset Displacement to prevent culling artifacts. More vertices = higher cost. Epic bakes their foliage animations to textures rather than calculating per-vertex WPO because of this overhead.Common Misconceptions
We’ve made these mistakes ourselves, so we’re sharing them to save you time.
“Nanite should be enabled everywhere”
Real testing contradicts this. We’ve seen a 5,000-triangle mesh with handcrafted LODs outperform Nanite reducing the same mesh to 4,000 triangles. In Epic’s own Lyra sample, Nanite added 9–11% GPU overhead on lowest settings and 20% on high preset. Multiple developers report City Sample vehicles on flat landscapes running at 40fps with Nanite versus 80+ fps without.
“Nanite = automatic optimization”
Nanite shifts your bottleneck, it doesn’t eliminate it. With traditional rendering, geometry is often your constraint. With Nanite, material cost explodes into the primary concern. If you’re not profiling materials, you’re likely leaving performance on the table.
“Nanite works for everything”
Nanite has base overhead regardless of scene content. Even with zero visible Nanite meshes, the instance cull pass consumes budget. Low-poly meshes add overhead without payoff. The sweet spot is genuinely high-poly assets (millions of triangles) that would be impossible to handle with traditional LODs.
Profiling and Visualization Tools
Access visualization modes via View Modes → Nanite Visualization in the viewport.
Key visualization modes:
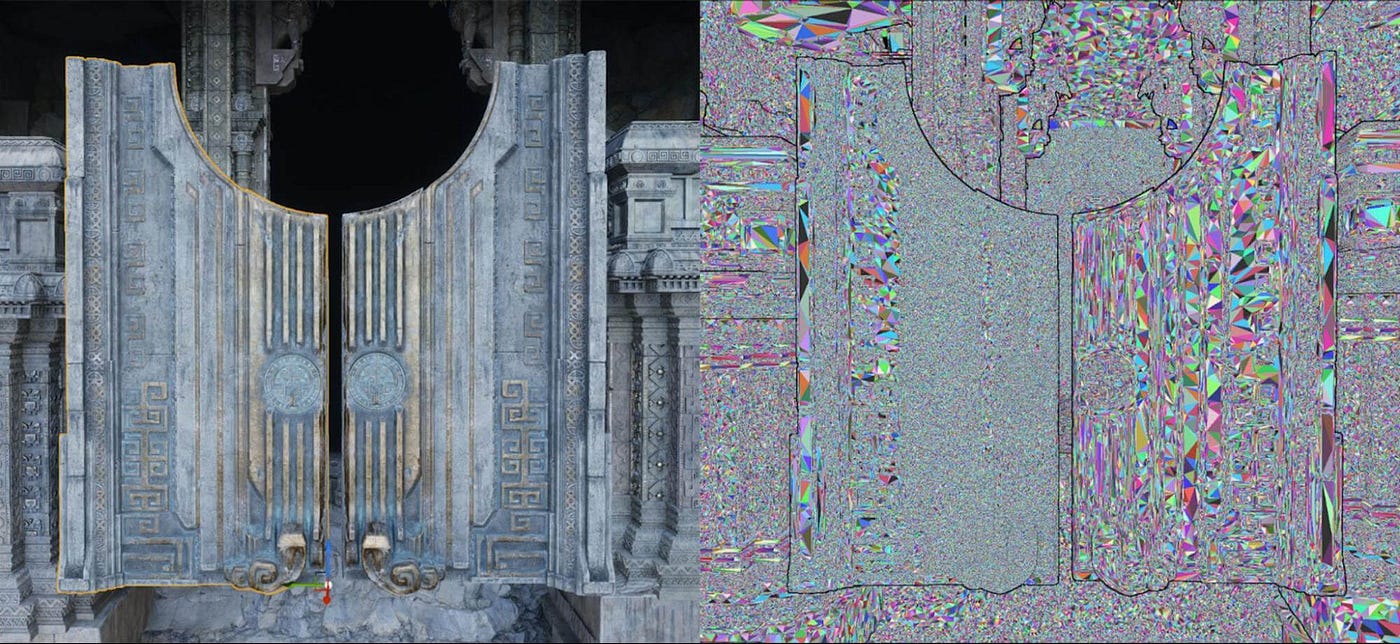
- Mask: Green = Nanite geometry, Red = non-Nanite. Use this to quickly identify what’s actually using Nanite.
- Triangles/Clusters: Display rendered geometry and cluster groupings at current LOD level.
- Overdraw: Shows overdraw amount including masked-out pixels — critical for diagnosing foliage performance issues.
- Evaluate WPO: Green = using World Position Offset (expensive), Red = not using WPO.
- Raster Bins: Reveals material batching. Many bins = overhead.
Console commands:
NaniteStats— Real-time culling statistics overlayNaniteStats Primary— Main view statsNaniteStats VirtualShadowMaps— Shadow performance statsr.nanite.showmeshdrawevents 1— Use with Unreal Insights to see which materials consume timer.Nanite.Visualize.Advanced 1— Low-level debugging options
Critical note: Always profile packaged builds, not editor. Performance differs significantly between them.
Decision Framework for Indies
Here’s our honest take on when Nanite makes sense for small teams.
Use Nanite when:
- Your assets genuinely have millions of triangles (photogrammetry, high-end scans)
- You’re targeting only high-end PCs and current-gen consoles
- You’re doing film/virtual production with relaxed frame targets
- You’re building arch viz with controlled viewing conditions
- You’ve tested and confirmed performance wins over LODs for your specific content
Skip Nanite when:
- Targeting Steam Deck, lower-end PCs, or Xbox Series S performance mode
- 60fps is a hard requirement with complex scenes
- Assets are under ~100K triangles per mesh
- Heavy masked material or WPO usage (animated foliage)
- Shipping timeline is tight — battle-tested LODs are safer
- Small team without bandwidth to learn Nanite’s edge cases
The practical test:
- Enable Nanite on your target assets
- Profile your packaged build (not editor)
- Disable Nanite and compare
- Make your decision based on actual numbers, not assumptions
Many developers report better performance without Nanite for typical game assets. The documentation claim that “Nanite meshes typically render faster” is true specifically for high-poly assets that would suffer severe quad overdraw without virtualized geometry — not for general-purpose game meshes.

Performance Numbers Worth Knowing
Some concrete figures to help calibrate expectations:
Memory footprint: Nanite averages about 14.4 bytes per input triangle — a 1-million-triangle mesh is roughly 14MB. This is actually 7.6x smaller than a traditional static mesh with 4 LODs. However, LOD generation roughly doubles storage, and streaming pool defaults may need tuning via
r.Nanite.Streaming.StreamingPoolSize.Render timing: Epic’s PS5 demo showed approximately 2.5ms to cull and rasterize all Nanite meshes, well within 60fps budgets. But this scales with screen resolution — Nanite’s visibility pass is fill-rate bound, which is why console games run at 720–1200p internal with TSR upscaling rather than native 4K.
What makes Nanite slow: Material bin overhead from many unique materials (especially masked foliage), WPO evaluation cost, closely stacked surfaces defeating HZB occlusion efficiency, and high instance counts saturating VRAM. Root clusters for ALL instances must remain in memory even when distant — this catches people off guard with heavily instanced foliage.
Quick Troubleshooting
A few issues we’ve run into that might save you debugging time:
“My Nanite mesh is invisible or flickering”: Check that your mesh doesn’t use unsupported materials (translucent, mesh decals). Also verify you’re not hitting VRAM limits — use
stat Nanite to monitor streaming budget.“Performance is worse with Nanite enabled”: This is common with lower-poly meshes or heavy masked material usage. Profile with
NaniteStats and check if material bins are the bottleneck. Consider if the mesh actually benefits from virtualized geometry.“Foliage performance tanked after enabling Nanite”: Masked materials are expensive. Check the Overdraw visualization mode — you’ll often see high overdraw from masked-out alpha. Epic recommends using opaque materials with geometric detail instead of alpha cards where possible.
“WPO animations cause culling issues”: Set
Max World Position Offset Displacement on your mesh to clamp the maximum displacement. Without this, Nanite can't accurately calculate bounds and may cull geometry incorrectly.“Steam Deck shows invisible buildings”: Known Proton driver issue with some Nanite content. Test on actual hardware early if Deck is a target platform. Consider providing a non-Nanite fallback path in graphics settings.
The Bottom Line
For indie developers, Nanite is a specialized tool for specific problems, not a universal upgrade. It’s incredible for photogrammetry-heavy environments on high-end hardware. It’s often counterproductive for stylized games, low-poly assets, or when targeting a broad hardware range.
Profile early. Test on target hardware. Don’t assume it helps until you’ve measured it.
\\\Check out this content on Medium
\\\Check out this content on Substack